

I did a simple bodice and added the gathered skirt and a matching bias tape ribbon. I really think it turned out great. I've added a pattern and tutorial below if you'd like to make one too!
Supplies Needed: 140-180 yards (depending on size) of sport weight yarn, I Hook (5.5 mm), 3/4 of a yard of cotton woven fabric (a vintage pillow case would also work!), matching sewing thread, sewing needle, sewing machine, bias tape maker (optional), iron.
Sizing, Yarn, and Fabric Requirements:
12-24 months: Chest: 23 inches, Yarn: 140 yards, Fabric: 3/4 yard, Skirt piece: 40 in by 20 in
2T-4T: Chest: 24 inches, Yarn: 160 yards, Fabric: 3/4 yard, Skirt piece: 42 in by 22 in
4-6: Chest: 26 inches, Yarn 180 yards, Fabric: 3/4 yard, Skirt piece: 42 in by 23 in
Make Yoke:
Yarn: Rowan Wool Cotton 4 ply.
Hook and Gauge: I used an I Hook (5.5 mm). Gauge is not critical, but for a yoke that looks like mine, 19 hdcf (see stitch guide) and 19 rows is a 4 inch square.
Stitch Guide and Terms Used:
Ch: Chain
Dc: Double crochet
Fsc: Foundation Single Crochet (ch 2, insert hook into 2nd ch from hook, pull up loop, yo, pull through one loop, [foundation chain made] yo, pull through two loops, [fsc made]). To make the next fsc, insert hook into the foundation chain of the previous fsc, pull up a loop, yo, pull through one loop, yo, pull through two loops.
Hdc: Half double crochet
Hdcf: Half double crochet in the front bar (yo, pull up a loop through the front bar of the next hdc (not the front loop, the bar in front of the front loop). See video tutorial below.
Sc: Single crochet
Sl: Slip
St: Stitch
Pattern:
Round 1: Fsc 64 times, join with sl st to first fsc of round. (64)
Round 2: Ch
1, 1 hdc in same st and next 7 st (hdc, ch 1, hdc) in next st, 1 hdc in next 14 st, (hdc,
ch 1, hdc) in next st, 1 hdc in next 16 st, (hdc, ch 1, hdc) in next st, 1
hdc in next 14 st, (hdc, ch 1, hdc) in next st, 1 hdc in next 8 st, sl st to
first hdc of round to join. (68)
Round 3: Ch
1, turn, [1 hdcf in each stitch to next ch 1 space, (hdc, ch 1, hdc) in next ch 1
space] 4 times, 1 hdcf in each st to end of round, sl st to first hdcf of round
to join. (76)
Repeat Round 3 until longer edge of piece measures half the chest measurement (see sizing chart above). Fasten off.


Fold the shorter sides of the yoke in half to form the armholes.
Round 1: Join yarn
in ch 1 spaces of 2 corners that form first armhole, work 1 sc through both
corners, work 1 sc in each st to next ch 1 space, work 1 sc through both corners forming 2nd armhole, work 1 sc in each st to end of round, sl st in first sc of round to join. Right side.
Round 2: Ch 1, work 1 dc in each st around, sl st in first dc of round to join.
Round 3-4: Ch 1, work 1 sc in each st around, sl st in first sc of round to join.
Fasten off and weave in your ends. Set yoke aside.
Make Skirt
Step 1: Cut your fabric to the specified dimensions based on the size you are making (see sizing chart above).

Your piece of fabric should look more or less like this:

Step 2: Finish raw edges. Zig-zag, overlock or serge the short edges and top edge of your fabric to prevent fraying. You can also cut those sides with pinking shears if you'd prefer.

Step 3: With right sides together, sew the short edges of your fabric together using 3/8 seam allowance.

Step 4: Press seam open.

Step 5: Mark the top edge of the fabric in fourths. Make a mark at the two sides and front and back of the top edge of your fabric with a washable marker or tailor's chalk.

Step 6: Gather the top edge of your fabric. There are many ways to do this. The most common way is to sew two rows of basting stitches and gently pull your bobbin threads. I like to do this by hand or to zig zag over a long length of bobbin thread. You may also buy a special gathering presser foot for your machine.
Attach Skirt to Yoke
Step 1: Flip yoke inside out.
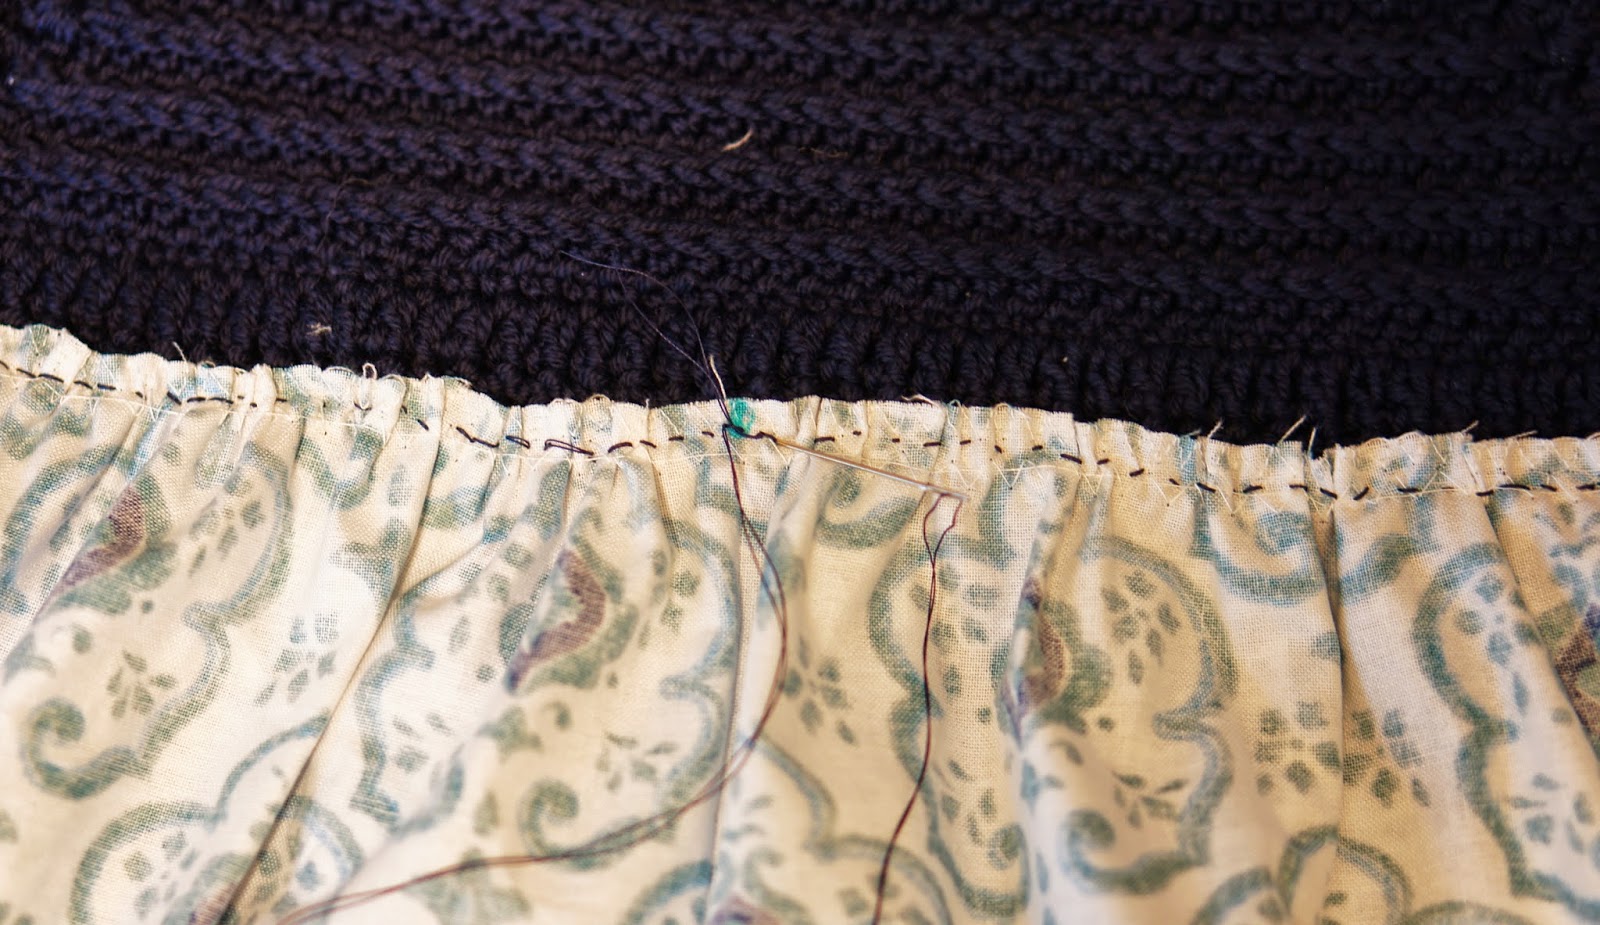
Step 2: Fit the skirt over the yoke and adjust your gathers so that your markings match the front, back and sides of the yoke. Pin in place.


Step 3: Using thread that matches the color of your yarn, hand stitch the yoke in place working your stitches in the rows of single crochet at the bottom of the yoke. I used a double strand of quilting thread and back stitched around for extra strength.


Step 4 (Optional): Flip your dress right side out. Hang it up and admire it. You may even want to jump up and down and clap and say OMG, I can't believe how great this is coming out!!!

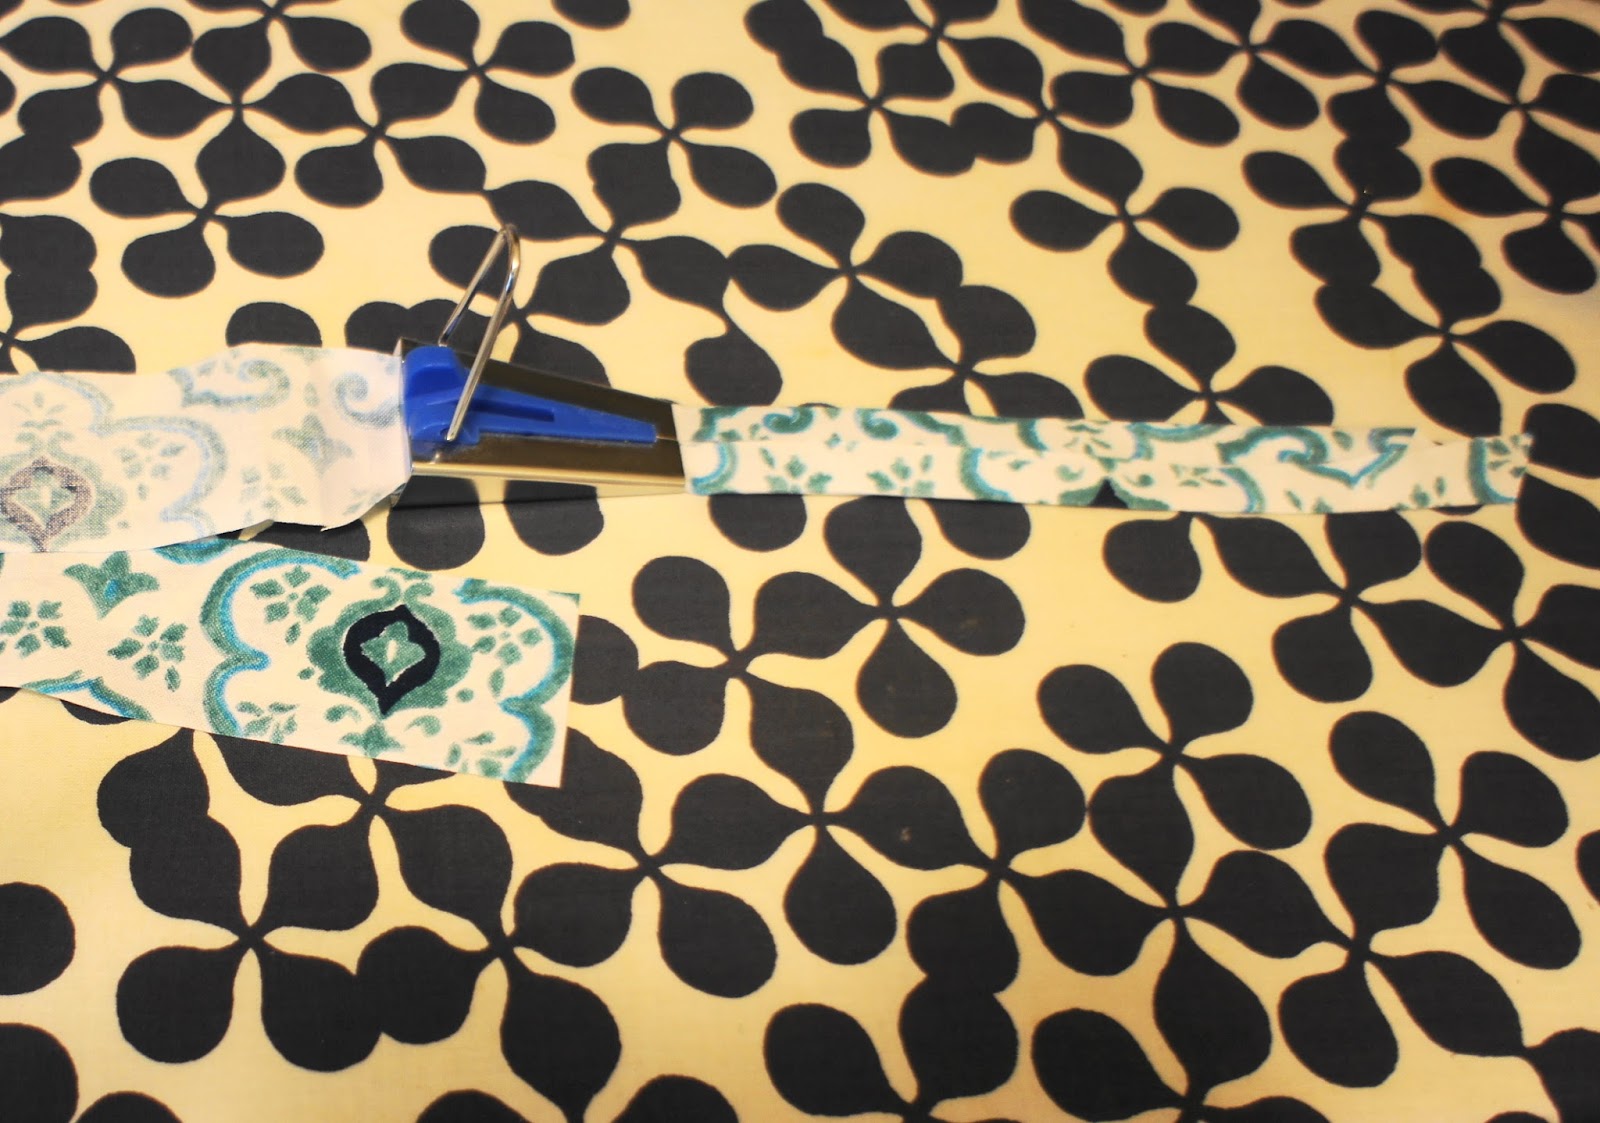
Make Bias Tape Ribbon:
Step 1: Cut a 2 inch strip of fabric from selvage to selvage (or approximately 42 inches long).
Step 2: Use a bias tape maker and an iron to press the edges of the strip towards the center. If you don't have a bias tape maker you can press the strip in half lengthwise, then fold the edges towards the center and press again. However, I highly recommend getting a bias tape maker! It is super cheap and makes the job so quick and easy.


Step 3: Unfold the short edges, tuck in the raw edges, and refold.

Step 4: Fold piece in half again and stitch about 1/8 of an inch away from the 2 folded edges.


Step 1: Cut your fabric to the specified dimensions based on the size you are making (see sizing chart above).

Your piece of fabric should look more or less like this:

Step 2: Finish raw edges. Zig-zag, overlock or serge the short edges and top edge of your fabric to prevent fraying. You can also cut those sides with pinking shears if you'd prefer.

Step 3: With right sides together, sew the short edges of your fabric together using 3/8 seam allowance.

Step 4: Press seam open.

Step 5: Mark the top edge of the fabric in fourths. Make a mark at the two sides and front and back of the top edge of your fabric with a washable marker or tailor's chalk.

Step 6: Gather the top edge of your fabric. There are many ways to do this. The most common way is to sew two rows of basting stitches and gently pull your bobbin threads. I like to do this by hand or to zig zag over a long length of bobbin thread. You may also buy a special gathering presser foot for your machine.
Attach Skirt to Yoke
Step 1: Flip yoke inside out.
Step 2: Fit the skirt over the yoke and adjust your gathers so that your markings match the front, back and sides of the yoke. Pin in place.


Step 3: Using thread that matches the color of your yarn, hand stitch the yoke in place working your stitches in the rows of single crochet at the bottom of the yoke. I used a double strand of quilting thread and back stitched around for extra strength.

Step 4 (Optional): Flip your dress right side out. Hang it up and admire it. You may even want to jump up and down and clap and say OMG, I can't believe how great this is coming out!!!

Make Bias Tape Ribbon:
Step 1: Cut a 2 inch strip of fabric from selvage to selvage (or approximately 42 inches long).
Step 2: Use a bias tape maker and an iron to press the edges of the strip towards the center. If you don't have a bias tape maker you can press the strip in half lengthwise, then fold the edges towards the center and press again. However, I highly recommend getting a bias tape maker! It is super cheap and makes the job so quick and easy.

Step 3: Unfold the short edges, tuck in the raw edges, and refold.

Step 4: Fold piece in half again and stitch about 1/8 of an inch away from the 2 folded edges.

Step 5: Weave ribbon in and out of th dc row of bodice as desired and tie a bow. I put the bow off center in the front, but I think it would also look cute in the back.

ALMOST DONE!
Hem Dress
Step 1: Press the bottom edge of skirt 1/4 inch and then 1 inch towards wrong side.


Step 2: Sew around the bottom about 7/8 of an inch from the bottom edge.

You are done!!!
Woo Hoo!!!


Beautiful!! Who wouldn't enjoy their first day at school in such a lovely dress!
ReplyDeletethank you!
DeleteWow!
ReplyDeleteThank you so much for sharing this nice pattern.
With three girls in the house and a love-to-sew-and-crochet-mum this is really a present for me!
Two more weeks left of school holidays and than it is back to school, unfortunately. Love having the girls around me whole day.
Best regards,
Nathaly - the Netherlands
No problem! It's really easy enough that you could make three for sure!
DeleteThis is awesome! I have always wanted to make dresses like this!
ReplyDeleteJacqueline Mukweto.com
Thanks so much!!!!
DeleteI can't figure out how to count how many fsc I have made can I just chain 65 ish and do 64 sc to start?
DeleteJacqueline Mukweto.com
You can chain, but make sure to chain very loosely and make sure it fits over the person's head and is not too tight. Make sure to work hdcs in the chains, not scs. Fscs are good because they are nice and loose and stretchy. That's why I like to use them especially around the neck.
DeleteThis is so lovely!!
ReplyDeleteOh my gosh. I am so glad that I found your blog. What a cute idea this is!! I love it.
ReplyDeletewww.the hookinphotographer.blogspot.com
Stop by and visit...
Yay!!!
DeleteThis is SO beautiful. I tried it for my two girls, however after just a few hours of wearing it, they started stretching out terribly! I was so dissapointed and not sure what went wrong as I am a beginner chrocheter..... any ideas?
ReplyDeleteI'm so sorry, that sounds really frustrating. It could be an issue of tension or your yarn. You can try using a smaller hook or try tightening after each stittch. You can try washing and drying the piece to see if it shrinks a bit too. Good luck!
DeleteThanks Sarah. I am going to keep trying, as my girls just love these dressess! I think it might be my yarn, to substitute the Rowan you used, what yarn type would you suggest? Must it be a cotton blend or 100% cotton?
ReplyDeleteCotton blend would work better than 100% cotton. Acrylic would work great too. I like to choose yarn with a bit of bounce, cotton will tend to stretch a bit unless it's blended with wool or acrylic. Try going down a hook size as well. Washable is always a good idea as well!
DeleteI made this dress yesterday. It was an easy pattern to follow (and I am a beginner.) Thanks for sharing this!
ReplyDeleteHello Sarah,
ReplyDeleteI am trying to make this dress but I am having so much trouble understanding the pattern, please help I am a beginner! First I use a 5 mm hook and it is way too loose and doesn't look right, then I tried with a 4 mm and still too big, I am using a 3.5 mm now and it is looking much better. I am not sure if it will turn ok because you stated you used a 5.5 mm hook! Thanks! Janet
Yes! Use the smaller hook. It will work out just fine. Good luck!
DeleteHello! Your dress is simply wonderful! I want to ask you about the terms are used in this pattern. Is it British or American Terminology? I crochet using the US terms, so the way that you crochet the Half double crochet in front bar, video tutorial, it seems like a Double crochet to me. Sorry for my bad English I'm not a native speaker.
ReplyDeleteThank you in advance!
Love the look of this :) Wondering what size hook I would have to use as I only have DK on hand? Please and thank you x
ReplyDeleteSo do you do the Fsc of 64 times for all the sizes, you just make for the different chest size? I am trying to make sets for a American Girl doll and little girl that match so just want to be sure I do this correct, I will of course have to change step one for the American Girl doll but just wanted to be sure I was working these up correctly ;)
ReplyDeleteYes, for those sizes, you'd fsc 64 times. With an american girl doll you'd have to reduce that by a lot!
DeleteThanks!
I'm having an issue, in your pictures, your bodice looks like it increases for every row you go around, yet in your pattern you say just to repeat the 3rd Row with 76 stitches (hdcf's) Does every row after the 3rd one stay at 76 or does it increase? I have several rows repeated after doing my 3rd Row and to me it just doesn't look right?
ReplyDeleteeach row you increase in the corners of the bodice. the (hdc, ch 1, hdc) in the chain one space increases it each time by four each row.
DeleteYou are adding 2 hdc to each corner, times 4 corners, makes 8. If your rounds are only increasing by 4 you are probably missing one of the stitches in the corner which is very easy to do. :-)
DeleteThanks for the free pattern. My MIL makes lovely dresses that are similar to this with knitted tops for my nieces. I can't knit and was looking for a crochet version to make. My coworker has 2 year old twins and I see two of these dresses in their future.
ReplyDeleteBeautiful dress. Can't wait to make one for my little girl. Thanks for sharing :-)
ReplyDeleteThe dress fabric you bought really good look on her. Thanks for taking time in making this tutorial.
DeleteThank you so much for this pattern! I am going to try and make this! I am new to sewing, so fingers crossed! I will let you know!
ReplyDeleteHi :)
ReplyDeleteFirstly great pattern
Second how do you adjust this pattern for other sizes smaller and larger please
Hi how many chains i have to do for size 4T? What hook size to use? What alterations i need to do for size 4T
ReplyDeleteCould the skirt be attached with a sewing machine?
ReplyDeleteI did attached it with sewing machine. Looks great
DeleteHello Thanks for the pattern. If I am doing the size 4T how many chains at the beginning?
ReplyDeleteI made this and it came out great ! Some changes I did. For a fuller skirt I cut the skirt fabric 2+1/2 times the chest measurement (or the circumference of the completed bodice). I found your instructions easy to follow. Thank you for a wonderful DIY tutorial.
ReplyDelete